This is the last post in this series of BIP Report Creation in Fusion Applications. In the last three posts I have shown how to create Data Model and Reports Definitions along with Bursting. You can find those here
This completes the series..Hope this will help the beginners who just now started Fusion Apps.
- Fusion Apps Custom BI Report Creation Part III
- Fusion Apps Custom BI Report Creation Part II
- Fusion Apps Custom BI Report Creation Part I
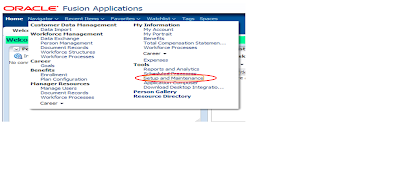
Create an ESS Jos Job to run this report. Login to Fusion Home. From Navigator choose “Setup and Maintenance”. You must have proper Role assigned in order to access this.
For my example I will use “Manage Custom Enterprise Scheduler Job for HCM and Payroll” Task to create our Job. In the FSM screen search this task
Click on Go To Task.
Click on Create Link to create a new Job.
Specify the Details as mentioned below
Click on “Show More” button to make all options available
Job Type must be of type ‘BIPJobType’
Check “Bursting Report” Check box
Report id is the absolute path of the report starting after “/shared/”. For our example we have entered “Human Capital Management/Payroll/DemoReport.xdo” in this field as full path of the report is “/shared/Human Capital Management/Payroll/DemoReport.xdo”
Check “Enable submission from Scheduled Processes” check box
Navigate to ‘User Properties’, add property ‘EXT_PortletContainerWebModule’ with value ‘Report’.
Define parameters in the “Parameter Tab”. As this report do not have any parameter we skipped this step.
Once the Job is Created, from Navigator choose “Scheduled Process”.
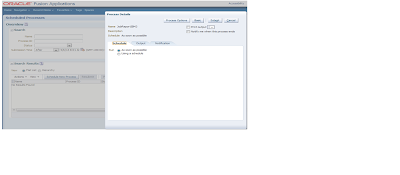
After clicking the Scheduled Process this screen will appear. Click on Schedule New Process Button. Search your Job name from the List & Click OK
Click on Submit. On successful submission system will confirm.This will submit a Job and system will give a Process ID.
Wait for the Process to Complete. This is almost same like Concurrent Requests in Ebusiness. Once the requests successfully completed you can see the output
As you can see a single request has created multiple reports. If you click on any one you will see the delivery confirmation that the email has been sent. Open your mail box if you had specified your id in the Bursting definition.
For me I got the email with output attached.
References
- Oracle Fusion Middleware Data Modeling Guide (Release 11g)
- Oracle® Fusion Applications Extensibility Guide 11g (Release 5 - 11.1.5)
- Report Designer's Guide for Oracle Business Intelligence Publisher Release 11g
- Oracle Support Documents
This completes the series..Hope this will help the beginners who just now started Fusion Apps.
Cheers.......


No comments:
Post a Comment